| |
Although tools exist to import Excel tables into ArcMap (e.g. the Excel Tools extension), with a little care and “preprocessing” Excel tables can also be
directly “Saved As…” CSV or dBase format in Excel such that they are available for table joins and other uses. To do so requires explicitly defining the field
types, cleaning the table of unfilled records, formulas and unique formats, and setting the column widths to integer values. Field names must also conform to
certain requirement.
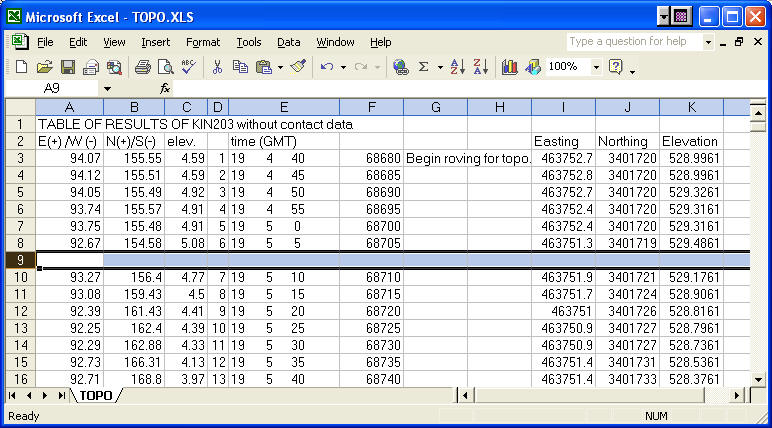
A typical(?) example might be GPS points and attributes saved in an Excel workbook, like that shown below:
|
|
|
| |
If this table were simply “Saved As” a CSV or dBase table, it would
fail to import in ArcMap or ArcCatalog. The following preprocessing steps
are first necessary (or at least good practice):
- Delete row 1 – titles are not allowed. This info. can be
incorporated in the new file name. Delete the entire row, not
just its contents (highlight it, then Edit>Delete). The first
row of the table should contain field names.
- Fix the field names in row 2:
- No special characters are permitted – no periods,
parentheses, plus or minus signs, back-slashes, etc. Spaces
are likewise not permitted in field names.
- Give column F and G a name. All columns must have field
names that are no more than 13 characters (additional
characters will be truncated when saved).
- Delete empty columns (e.g. columns H and L; highlight the
columns and Edit>Delete).
- Field types need to be explicitly defined. Highlight values
in each column and Format>Cells to either “Number” with the
appropriate number of decimal places, “Text” or “Date” (latter
not applicable in this case). Column E should be defined as
“Text” because it contains spaces between the numbers. If it
will be used in calculations (i.e. it should be “Number”) then
it should be parsed into separate columns (hours, minutes,
seconds). Finally, keep in mind that if the table is to be
joined or related to another table then fields that will be the
basis of the join/relate must be of the same type (see the
tip
on joining tables).
- Delete row 9 – blank records are not good. Delete any other
blank records in the table. This would include any at the bottom
of the table that contain no values (highlight the extra rows,
then Edit>Delete).
- Highlight all records and remove any special formats (e.g.
italics, bold, etc.) using Format>Cells>Font and defining the
Font Style as “Regular” and Size to an integer value. The Font
should be a standard one, but otherwise this makes no
difference. With all cells highlighted, Format>Cells>Alignment
to “General” and remove any text wrapping, cell merges, or
“shrinks to fit”.
- Convert any cells filled with formulas to values (highlight
the cells then Edit>Copy, then Edit>Paste Special>values)
- Set the column widths so that all cell values are completely
visible (some may have become partially hidden after the last
step). Then explicitly define the column widths to integer
values: Format>Column>Width… removing all decimal values.
- Remove any additional worksheets from the workbook
(Edit>Delete Sheet after highlighting the sheets tab at the
bottom of the window) (Not applicable in this example).
“Save As…” CSV or DBF 4 (dBASE IV) (the
latter is only available in older versions of Excel) and answer Yes to the first Message
box. Upon closing the original spreadsheet, answer No to the
message box that asks about saving changes.
Check your resulting file in ArcCatalog for any errors. An OID
field may be temporarily added to the table by the program; this
cannot be edited or changed. Check the field types by
right-clicking on the table, asking for Properties and viewing the
Fields tab. New fields can be added during this step if desired.
If the table cannot be viewed or the field types are not
properly specified, load your new CSV or dBase table into Excel,
highlight and copy all of the cells, open a new Excel worksheet,
Edit>Paste Special>Text , and make changes as needed before saving
it again as CSV or dBase IV.
|
|
|